Friday 21 December 2012

Work In Progress

This was the first part of my city - the cathedral.
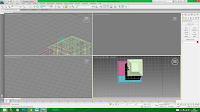
It has a fairly simple design, consisting of 2 floors and a bell tower.
On the lower floor I wanted to give it large windows to let in all the light as most cathedrals do. It also has a smaller quarters for the head of the town to live.
There is a large bell tower - this will be the signal and almost beacon for the city. I will have this in the center of my castle as it is the most important feature.
This is a bell I am making for the bell tower - it is made up of 4 parts - the bottom cylinder, that has an extruded middle just for character, and a hallowed bottom. The long cylinder, this curve on this was created by selecting vertexes and scaling them down each time, selecting a row less. The ball, at the bottom in the hallowed of the cylinder and the grasp, this is made up of a smaller cylinder and a doughnut shape. This would hold the bell up within the tower.
This is the bell being fitted into the bell tower on my cathedral, I initially made the bell massive to make it easier to create and design - I then scaled it down to size and fit it in nicely within the bell tower.


This is my Gate Tower, this is the where the main and only entrance to the castle is, as you can se it looks heavily fortified, only having thin slots for windows which would be covered but some form of gating or fencing. Along with this it has large uprights all along the top of it for protection from artillery, and also has slots to fire out of. Along with this I have also included traps of sorts - this this is where the over-hang is. There is funnel-like shapes where boiling oil or other lethal things can be used to be dropped ontop of the enemy.

I wanted my city to be 'magical' and so I have created 'mage towers' these towers are quite simple. having a large gap the quarters up the structure to hold some form of magical beacon that would protect the city. There will be 3 of the these, forming an arrow.
This is one of my defensive towers, it is a coroner tower, which allows the firing of projectiles in all directions and allows for surveillance all over the city and outside. These have got fairly large windows however I have protected them with bars. It also has up-rights on the top for protection for archers on-top

This is going to be a house, seeing as this is going to be a highly defensive 'magical' castle city, I thought that only those whom can afford it should live within this structure. And so each house is quite grand. I wanted all my houses to look similar and with enough space around it for gardens and what not.
This is the size I have aloted for the garden, each house will have this amount of garden and probably the same size house. Each house also has a chimney. The gardens are marked with fences.
I creates a small door handle for the front door to the house, this was then locked to the door. I have also made it so that when rotated the door and handle will rotate together on a pivot - i.e. like a real door.

This is a close-up of my fence. As you can see they are each the same size and have a peaked top, They are all joined together by a small plank. At the corners the upright part of the fence is in tow part each facing in a different direction creating a corner.
This is an over-all layout of my castle thus far. As you can see the three 'mage towers' make up the arrow shape, and the main cathedral is in the center. The main square of the city is probably going to be purely defensive.
this is the size of a house next to a wall to give an idea of how small they are in comparison to my large castle walls. I wanted the walls to be so big purely for protection and safety purposes - hopefully this would make the citizens of the castle town feel safe and not trapped.

 This is the finished layout, as you can see I have made the left and right wings both urban and full of houses, each house still has the garden and fencing  Along with this there is a large empty patch witch may in the future be small park areas or at least have grass ant trees.

Castle Ideas and inspirations


 Ba-sing-se (Avatar)
Although it inst castle, the massive city has many features that a castle has, as the city is a massive fortification, featuring many out-walls all with architectural designs for defense and offense.

 Omashu (Avatar)
Once again, this is not a castle, rather another city, with major fortifications and a castle-like structure, having most defensive
protocols in place that a castle would


 Minas Tirith (Lord of the Rings)
Minas Tirith is a large fortified city within the LOTR franchise - this massive city is more like a castle with a city within it than any other fortification, as it has all main features of a castle within this amazing make-belief structure.


Dalaran (World of Warcraft)

Dalaran isnt a castle, but it still hold some features of castle-like fortifications. Dalaran is a magic flying city in the WoW franchise and will be the main point of inspiration for me as I would like to create some form of magical fantasy castle myself. Although mine will be a castle and not a city some of the eye-catching things that are featured within the magic city I am hoping to re-create or have a have base from


After inspecting and measuring many castles and cathedrals (on Google Earth) I have come to the conclusion that my Castle should be approximately 300-400 feet (that being just the floor plan)

I am a big fan of a game called 'Minecraft' and in one of my most recent saves on the game I made a fairly big castle / fortress city.
putting all this time into this game I couldn't help but admire my creation, and I was struggling with ideas I thought that I could base it off of my Minecraft save - obviously I would make alterations where necessary but I thought I could at least use this as a starting point.

 This is the overall layout of my castle city, on the left wing of the city is my urban area, were all of the houses and such are. On the right wing is all my farmland, with live stock and crops.
 This is the outside wall of the front of the city, as you can see it has massive towers on each of the corners, and a large gate tower.


This is my cathedral  almost right in the middle of the city, sitting along the back wall of the main square, linked to all parts of my city.

Thursday 8 November 2012

Level Design


Lists
Area of some size enclosed by a stockade and located around the castle.

chemise
Wall enclosing the base of the keep to defend it.

bartizan
A sentry box projecting from a wall used to survey the surrounding area.

moat
Water-filled trench protecting the castle’s ramparts.

stockade
The castle’s first line of defense, made up of a row of pickets or boards.

parapet walk
Passageway along a wall, making it possible to shoot and perform surveillance.

postern
Secret door built into a rampart.

brattice
Small box or machicolation projecting from the wall to reinforce its defense.

battlement
Wall allowing defenders of the fortification to fire from a protected position.

chapel
Place of worship.

keep
Castle’s main tower, serving as a final stronghold in the event of attack.

pinnacle
Steeple-shaped ornament atop the keep.

footbridge
Narrow bridge used to cross the moat and reach the drawbridge.

barbican
Freestanding defense with arrow slits used to defend the castle’s footbridge.

rampart
Thick wall that formed the castle’s outer defense.

drawbridge
Movable bridge that was lowered to allow people to cross the moat and raised to prevent access to the
castle.

machicolation
Balcony made of masonry with apertures in the floor through which projectiles were dropped on assailants.

guardhouse
Structure serving as living quarters for the guards.

corbel
Stone projection on a wall to support the top of a tower or wall.

curtain wall
Stone wall connecting two towers or bastions.

bailey
Uncovered space bordered by the castle’s buildings and curtain walls.

covered parapet walk
Covered corridor constructed along a battlement and designed to allow the free movement of guards.

flanking tower
Defense tower making it possible to fire a shot parallel to the curtain wall.

turret
Small watchtower.

castle
Apartments of the lord and his family.

corner tower
Circular tower allowing surveillance and defense in all directions.

Friday 12 October 2012

making a gate tower

First  of all make a cylinder, and on the parameters set it so that the height and cap segments are set to 1 and the sides are set to 18.
and then just create a large Cylinder.

 Rotate this cylinder so tat it is up-right at 90%, and then on the measurements set the height to 180. Select your cylinder and on the modifier tab select slice - set this to 180
 goon polygon mode and then select the bottom polygons of the shape, and then extrude this by 128
 Inset the tombstone shape by 8, then extrude by -4, do this a couple times to create a 'stepped edge' – do this as many times as you want.
Once done, delete both sides of the inside polygons.
 Go onto edge , select the two inner edges and then select bridge – then go onto polygon and select the newly made poly going around (due to bridge) and then extrude this by -8 (ensuring that the drop down on the extrude menu is set to local normal). This will create an inset.
 After that, you then select the top polygons, delete them. Then go onto edge tool and select the top rectangles and drag them up, with the top still select bridge the top. Then select border, select the front border and ‘cap’ it and the back
 we then made a plane (easy to see in y frame mode by pressing F3) and made sure it was just big enough to cover the hole. From here with the plane selected you go onto the modifier list and select ‘lattice’  this will give it a gate effect. You then scale your gate tower so that it can hide the lattice properly.
You can then add detail as you see fit.

Thursday 11 October 2012

Making a Keep

 first we made a block –
height= 960
length = 1280width = 1600 
and then we made a reference block for a man Width - 32 height = 96 length = 32


We then used Bevel on the top polygon and had the height set to 0 and the width at 64 to create a lip, then extrude set this to 120
Then select the  back poly and top inset by 64
Extrude the top by -64

Delete the top of the back polygons to create a gap, the delete the top polygon.


 Select the back and front edges and then from the bottom tools select bridge, this will then fill in your top gap.There is a tear with the fixing, so to fix this you need to go onto vertex(instead of poly) and then you select one of the vertex in the top right hand corner by the gap, right click and select ‘target wield’ – you then select middle vertex and the bottom on the inner side (for both) and then it will join them.


you then select on the edges from the front of the keep, ring them and then slect connect – choose 12 segments and then from here with them all selected you have to scale them on the z axis so that they all align. Do this again for the other side by scaling them on the y axis.


you the select the top of the middle polygons on the front lip, you then extrude them 64, then 128 and then 64.


Then select the front polygons in selecting the 2 fronts ones first, and then on the second column selecting 2 and then carry on until the end- you then extrude your selection by 128


select the top and bottom on the ones that were missed, you then inset your selection by 32 then delete the selection.
From here you select border, drag a selection box over the area we were just working on to make the holes, once selected then select bridge.
you then use your move tool to create a funnel effect


then select the polygons from the front of the battlement, extrude them, and then you select every other block and extrude them for protection of the 'player, do the same selecting ever other polygon on the top of the sides. 


you then create more pols in the front, by selecting an edge using the ring function and then implementing to segments with a side of 64 and a pinch of -18
you then inset every other block by 64, and then extrude it by -40


We then deleted the bottom polygons to save on space and reduce the amount of polygons. Then choose all of the polygons on the roof apart from a ring of 2 thick around the sides, extrude this by 720, and then bevel ontop of this

Once done, you then repeat the process of making battlement on top, once again to supply the player with cover and protection

Friday 28 September 2012

Demo 4 Barrels

BARRELS!! >:(

 First of all we made a Cylinder, and adjusted the amount of polygons with it, from here we made it a convertible poly, and selected vertex. from here we started to select all the vertexes (apart from the middle one) and slowly enlarged them together, selecting one less row of vertexes at a time.
 We continued doing this until we got a barrel-like shape. We the made sure that the convertible poly was not selected and then went onto the drop-down list and selected 'UNWRAP UVW' from here we made sure that none of the barrel was selected apart from the top, we then chose the cylindral map, selected the top again and the select planar map, from here we opened up UV editor, selected the map and dragged it off the screen, we repeated this for the bottom/.

We had to make sure that the map hadn't been stretched, so in order to adjust this, we selected the checker patter and then checker pattern from the drop down, and the scaled down the checked so that it shows squares on the 3d Viewer.
we then saved the map again, and created a custom wood skin and exported it to 3DS Max and applied the skin to the barrel.

Thursday 27 September 2012

Demo 3 - Making a crate

For this demo we wanted to unwrap and texture something harder than just a box, so we decided to make a crate instead, this will have many more polygons to cover and texture, along with creating a more intricate net.

 First of all we had to make the shape of the crate, so to do this, you make the square and then make it a 'editable poly' from here (ensuring that it is all highlighted and that polygon is on, on the drop down) you have to inset smaller squares into our cube

  Once done, we then have to extrude these inset squares, and so I set it to -2 so that it would inverse the squares and take it away from the cube. After this we then made a thin rectangular cuboid, the length of the square and set it diagonally in the crate, after placing it in place and ensuring it is at a 45% we then adjusted the length accordingly so that it would be the full length of the inner-square


To save on ram space, we deleted some of 'invisible' sides of the smaller rectangle. This was done by selecting the rectangle and then right-clicking it you then select 'isolate'. this will then only show the rectangle, make it a convertible poly, select polygon on the drop down and then just select sides that you wont see and delete them. Go back to the polygon tab, and select your plank, right-click it and choose 'attach' you then click your box. This will mess up your pivot, so you adjust this by selecting  utilities (hammer on the right hand side tab) and then select reset 'reset xform'. after that go onto modifier right clikc xform and select comapct all

you then show the UV Editor, one the window is up, select all of your shape and then choose "flatten Mapping" this will explode the net, you want to remove everythign from the area,

 this is done by selecting the object and moving it out of the checkered area, ensuring that you have select by element on (next the the red square). Once done have edge selected (red triangle) and select the edge of one of the SQUARES right click this-and select stitch, do this floor all the squares and the long plan


You can then move the squares back in, select one and put it into the corner, right-click the shape and select copy, you then go to all the squares and select paste (do the same with the larger squares.) Move everything together out of the screen, and bring back in the large squares and scale them to the size of the checked area, and then bring in the normal squares scaling them to the same size as the inner of the large ones and then just the plank. 

Then save the net put it into the Photoshop and apply a texture to the shape, I put a burn effect on the inner square where the creases would be.

Once done ave the net and bring it back into the mapping.